For part one of this story click here.
It took me and fellow writer/first-time homebrewer Kate Brennan a while to find the time to start our homebrewing adventure after we picked up our supplies at Artisan Homebrew in Downingtown. We set out to create a homebrew that would impress our friends and family and show that two gals could brew right alongside the male homebrewers out there. The idea seemed simple enough; I mean, if guys can do it, it can’t be THAT hard, right? As it turns out, despite the fact that we aren’t easily intimidated by such adventures, we were pretty freakin’ girly about it.
Mike at Artisan Homebrew was very helpful in explaining each step of homebrewing and we learned how important it was to kill everything that could potentially grow something that wouldn’t aide in the creation of a delicious brew. Mike supplied us with a few packets of powder to use to sanitize all the buckets, pots, spoons and other brewing equipment. First we needed to clean the kitchen and work space, then fill the sink with water and a packet of powder to dip all materials in and then let them air dry. The packet said “use gloves, don’t breathe in” and other intimidating warnings, so I was hesitant to use it. We started out using tongs and gloves to get the items in and out of the water. Once we realized that the skin was still on our hands and that the powder, once diluted, was harmless, we became less girly about it.
Luckily, I happen to own two, three-gallon stock pots that were just the right size for us to boil our mixture of fermentable goodness. When the recipe called for two and a half gallons of water I was naive to think that my trusty Brita home filter would be able to provide enough to get us started. After waiting 10 minutes and having only a few cups of water we realized we needed to make a run to the store. On the way there, of course, we belted out tunes in our girliest possible voices a la karaoke night. Girliness gets us again.
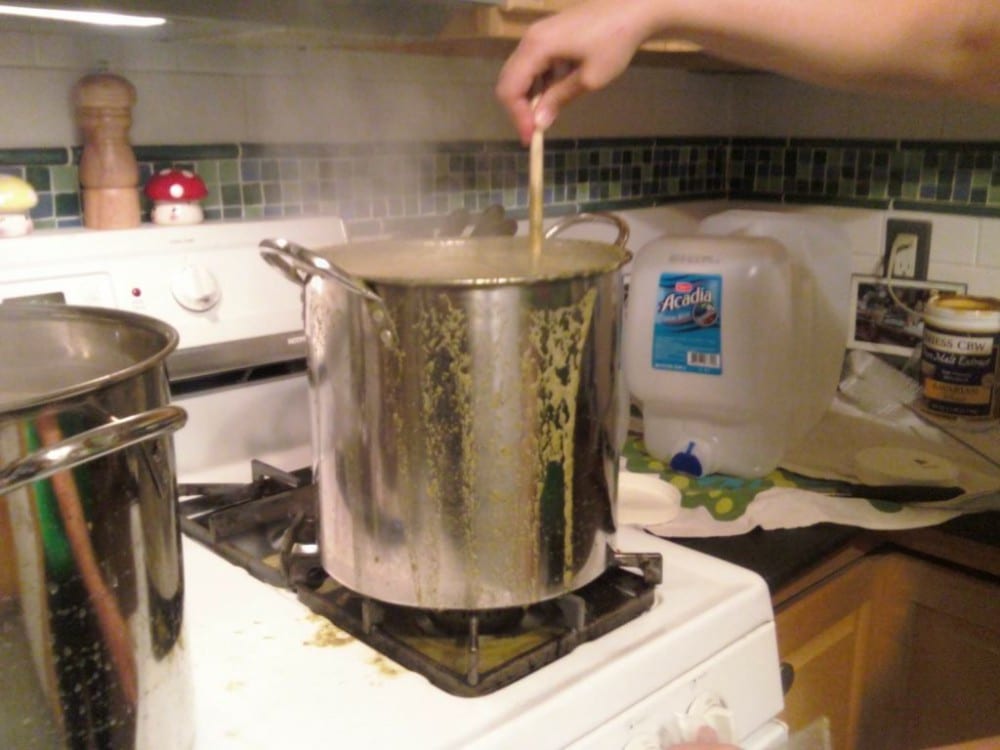
When we returned we realized we were missing one very important ingredient. BEER. We each cracked open a cold store-bought brew while we boiled the gallons of water in our respective pots. I assumed that the process would take about an hour because the “recipe” showed the boil to last for 60 minutes. I was way wrong. By the time we finished sanitizing the equipment and buying more water we had been at it for an hour already. And, if you think getting pasta water to boil takes awhile, try waiting for two and a half gallons to start rolling. Another half an hour later and it was finally time to add ingredients. Since I was making a wheat beer, I was instructed to add two bottles of a gooey malt to my water; Kate’s called for a powder version.
Mike told us there was a 50% “boil-over” rate once we start adding hops and other ingredients. Kate and I made bets on which one would have the mess to clean up. We both lost. At different times our pots boiled over with an icky, sticky concoction. We forged on, realizing that the brew doesn’t like wooden spoons (it caused it to overflow) and that a whisk did the trick to stir the hops and other ingredients to make our wort.
As we stirred our brews, we sipped our beers to keep us cool in the hot kitchen and remind us of the goodness that would come after this process. Being a gal that loves to taste as I cook or bake, this may have been the first time I certainly was not going to taste the boiling wort for fear of the taste, the temperature and contaminating it. Thank goodness I had some cold beer on hand to taste as we went and keep us motivated. And yes, I was a bit of a wuss over the wort boiling over and the mess of the concoction flowing onto my stove and onto my kitchen floor. As with anything, though; you do it once and learn from it, so I hope to be less delicate about it the next time around.
Despite the mess they made, Mike explained to us that hops are very important to beer. They contribute a significant amount of the aroma of most styles as well as some flavor. Their oils add a bittering quality to the beer, which is important to balance the sweetness of the malt.
If you’re brewing from a recipe, like us, you will see a “hops schedule,” which requires you to add some hops near the beginning of the boil, some more somewhere in the middle and the rest during the last five minutes. These schedules are based on the fact that hops break down during the boil, so the longer they are in the boil the more their bittering qualities are released and absorbed into the wort. Thus, the more hops that go in early in the boil, the more bitter your beer will be. The more hops that go in towards the end of the boil, the hoppier your beer will seem in aroma and flavor, though not necessarily in bitterness. Kate had a more vigorous hop schedule than I did because she is making a very hoppy IPA beer.
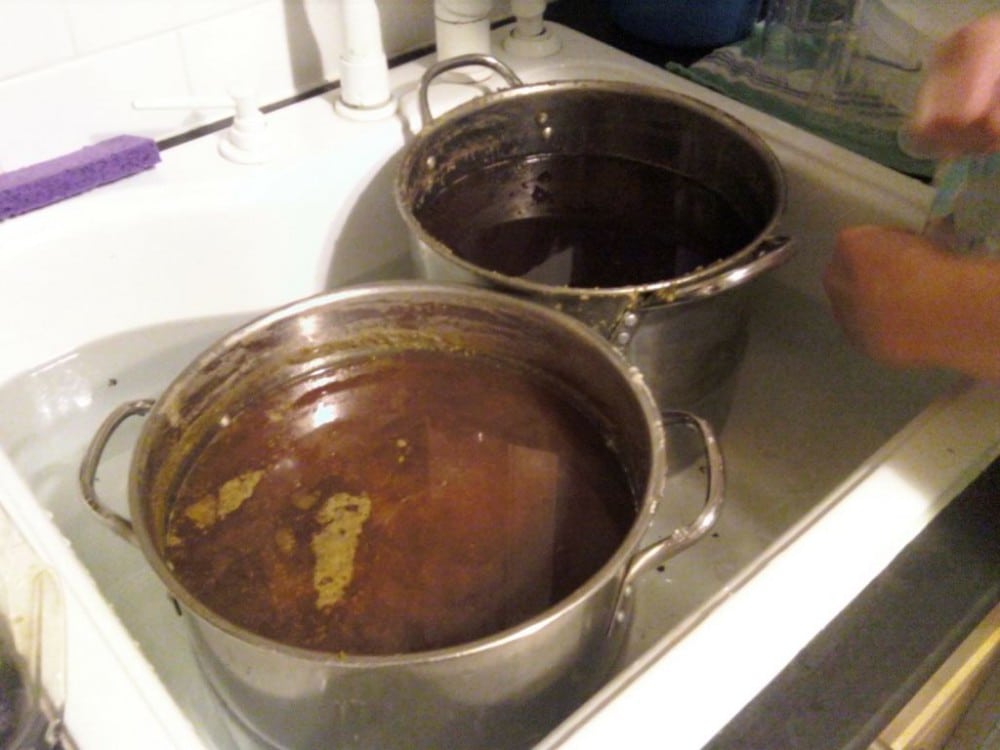
After we created our bubbly batch of wort, it was time to chill it down. It’s important to stop the heat so it doesn’t continue cooking for too long. Again, I was silly to think my little ole ice maker would suffice to chill two big boiling pots of wort. So, off to the store we went again to get ice and more water. As it turns out, the first few gallons was not enough, so we had to buy a few more to mix with our wort. Lesson learned. After that you add the yeast to help it ferment into a buzzed delight.
So, I currently have two large buckets of beer fermenting in my basement and I am pretty damn proud. Yes, I was innitially clueless about the whole thing. But, with the help of Artisan Homebrew we became well informed and set up for success. The whole process has been a wonderful challenge thus far.
For you lads and lasses that want to brew for yourself, remember: don’t be afraid of the sanitizer, buy LOTS of water BEFORE you start, buy plenty of ice and keep your need for instant gratification in check. It will pay off.
Next step for us: Bottling! Wish us luck and check back soon to find out how that process is going.
To get started on your own brew, visit Artisan Homebrew at 128 E. Lancaster Ave., Downingtown, PA 19355.


